Many people are using Blender to create 3D assets to use in Unity3D, but the conversion doesn’t always go smoothly. I decided to spend some time researching and documenting the process and to provide solutions for key problems.
Model orientation
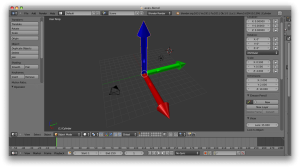
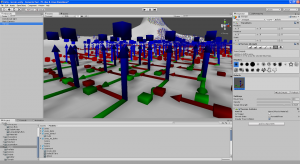
The first problem people often report is the orientation of models. Blender and Unity3D are using different coordinate systems and every model moving between them has to go through a conversion. To visualise this I made a simple test model in Blender, with arrow models aligned with the coordinate axes. The first thing to note is that Z is up and Blender is using a right handed coordinate system.
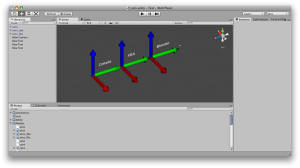
This model is easily imported into Unity and shown here with the camera rotated so that the model has the same orientation as in Blender. The model is imported once as a .blend file, once as a FBX file and once as a Collada DAE file. The axes don’t match at all, so we need to have a look for the reasons.
The easiest change to explain is the change to Y and Z: Unity3D works with the Y axis up, so Blender rotates the model by 90 degree around the X axis. The other change is a bit more complicated: Unity3D uses a left handed coordinate system, so the model has to be mirrored during import to make sure it looks the same as in Blender.
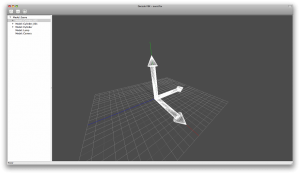
A quick look in a different FBX viewer shows that this must be done during import into Unity3D and not export from Blender. Annoyingly unintuitive, but this seems to match the Blender exporter code. We can use this information to predict how a model will be oriented when imported into Unity3D: up will stay up, positive Y in Blender will point towards negative Z in Unity3D and positive X in Blender will point towards negative X in Unity3D.
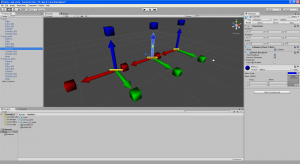
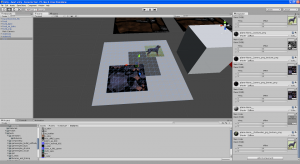
Unfortunately this is not the whole story: Blender bakes the rotation around X only into the transforms, so if a model is used for example as a terrain tree model it will be drawn sideways. I made a change to the exporter to bake this change into the actual mesh data, which solves this kind of problem. It will need some testing before it can be applied to the official Blender distribution, but now you can use Blender models in a terrain without having too much of a headache about which axis is up.
This is a model exported with baked space transform used as a “tree” in a terrain.
Model materials
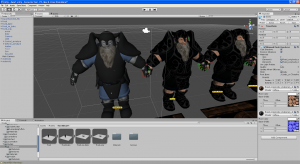
The other big problem people are having is with material export. This shows a dwarf model exported with the original exporter, which fails to assign materials even remotely close to the Blender scene. This is no surprise because the shading systems in Unity3D and Blender are very different: Blender’s shading system is meant for offline rendering, and Unity3D’s shading system is meant for efficient hardware rendering on many devices. It is still disappointing that the materials are not even close within the limitations of the two systems. This can be explained by the system that the Blender FBX exporter uses to select textures: You can assign textures directly to the UV data in a mesh, and the exporter combines those textures with the meshes’ material settings.
I changed the system so that it goes through a material’s texture slots and writes out the textures. Unity3D is able to pick the correct diffuse and normal maps from that.
There doesn’t seem to be a way for FBX files to specify exactly which UV map has to be used for a texture, so the UV settings in a texture are ignored for now. Unity3D uses only the first two UV maps anyway (one for textures, one for lightmaps), so this shouldn’t be a big problem. I think it would be possible to handle some cases by rebuilding UV data during export, but that may never be able to handle all cases and cause more problems and unpredictable behaviour down the line.
The old system is still useful as a fallback, so it is used for meshes that have no material assigned. The textures in this example come from the OpenGameArt models benny and skeleton.
General Problems
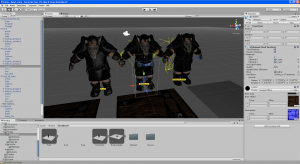
There are often problems in models that are not easily visible in a modelling application, but show up in a realtime engine. In this case there are a few vertices near the boots that have no bone attached to them. These don’t show up in Blender because bone envelopes are enabled, but show up in Unity3D because the realtime skinning only uses vertex groups. There is a useful third party script to show vertex weights in Blender that makes it is easy to find misbehaving vertices and to add or remove them from vertex groups.
Blender can embed textures into a .blend file. That is very handy for sharing scenes, but Unity3D has no way to access those textures and the FBX exporter doesn’t write them out. The menu option “File/External Data/Unpack into Files” can be used to extract most textures, though textures that were created inside Blender, for example with the texture paint tool, may need to be saved manually. This can be done in the UV/Image Editor with menu option “Image/Save Image”.
Beta test the new exporter
You can beta-test the new version of the Blender FBX exporter so that more problems can be caught before it goes into Blender officially. I developed my changes with Blender 2.68a, but there is a good chance that the script will work with earlier versions.
- The space transform from Z-up to Y-up is baked into the whole model including the geometry.
- This MAY break models that have been imported and posed into Unity3D already, so it shouldn’t be changed in the middle of a project.
- Textures are now taken from the material’s texture slots instead of the uv layers. This means that normal maps transfer over correctly. The code falls back to uvlayer textures only if no material is set.
- This MAY break models that rely on the old behaviour. If your textures are set on the material you should be fine.
Please remember that this is a beta version and you should be careful with it in production work. Mixing models exported with the new and old exporter is most likely going to cause problems at some point. If you are in a team then please discuss it with team mates or leads before using it, and try it out on a separate copy of the project first.
It is very important that you make a backup of the existing exporter script before installing this, in case you want to return to the old version.
Installation
This code replaces Blender’s original export scripts. On Windows they are in %PROGRAMFILES%\Blender Foundation\Blender\<version>\scripts\addons\io_scene_fbx
On OSX they are in the application bundle, in
Contents/MacOS/<version>/scripts/addons/io_scene_fbx
You can disable baking the space transform if you export an FBX file manually from Blender. The option is the last at the bottom called “Bake Space Transform”. To change the default you have to modify the code:
bake_space_transform = BoolProperty(
            name="Bake Space Transform",
            description="Bake the transform from Blender's space into target space into all transforms and the mesh data",
            default=False,
            )
Change the default to False. The settings that Unity3D uses for importing .blend files are hardcoded in the other file:
def defaults_unity3d():
	return dict(global_matrix=Matrix.Rotation(-math.pi / 2.0, 4, 'X'),
		    use_selection=False,
		    object_types={'ARMATURE', 'EMPTY', 'MESH'},
		    use_mesh_modifiers=True,
		    use_armature_deform_only=True,
		    use_anim=True,
		    use_anim_optimize=False,
		    use_anim_action_all=True,
		    batch_mode='OFF',
		    use_default_take=True,
		    bake_space_transform=False
		    )
Change bake_space_transform to False. Unfortunately the changes to the material system were too extensive to make an option to switch to the old system,
Here is the script for download:
http://www.restemeier.com/blog/io_scene_fbx.zip
Please let me know about your results!
Update: From what I’ve heard there will be a significant rewrite of the FBX exporter in one of the next versions of Blender. If you’re visiting this from the future, this was tested on Blender 2.68a, and I’ll try to re-test this on the new exporter as soon as it arrives.
Update 2: My patch was accepted into Blender, so Blender 2.71 will come with the “Bake Space Transform” option available.
I had to disable comments again thanks to spam. You can reach me on Twitter and Google Plus.
